
Send your contact form to a Google Sheet
Bright Smile Dental already has a “Get in touch” form on its website. It emails nobody reliably and nothing keeps a record. In about ten minutes it will write every enquiry into a spreadsheet the practice owns.
- The scenario
- A two-chair dental practice has a contact form on
brightsmiledental.com/contact. Reception wants every enquiry in one list they can sort, filter and tick off — not scattered across an inbox. - What you end up with
- A Google Sheet in the practice's own Drive that gains one row per enquiry, with the date it arrived and the date it reached Google.
- You need
- The Google account the practice wants to own the spreadsheet
- Access to edit the page the form is published on
- The exact domain the form is published at —
brightsmiledental.com, not a preview address
-
Account › Google
Sign in, then connect Google separately
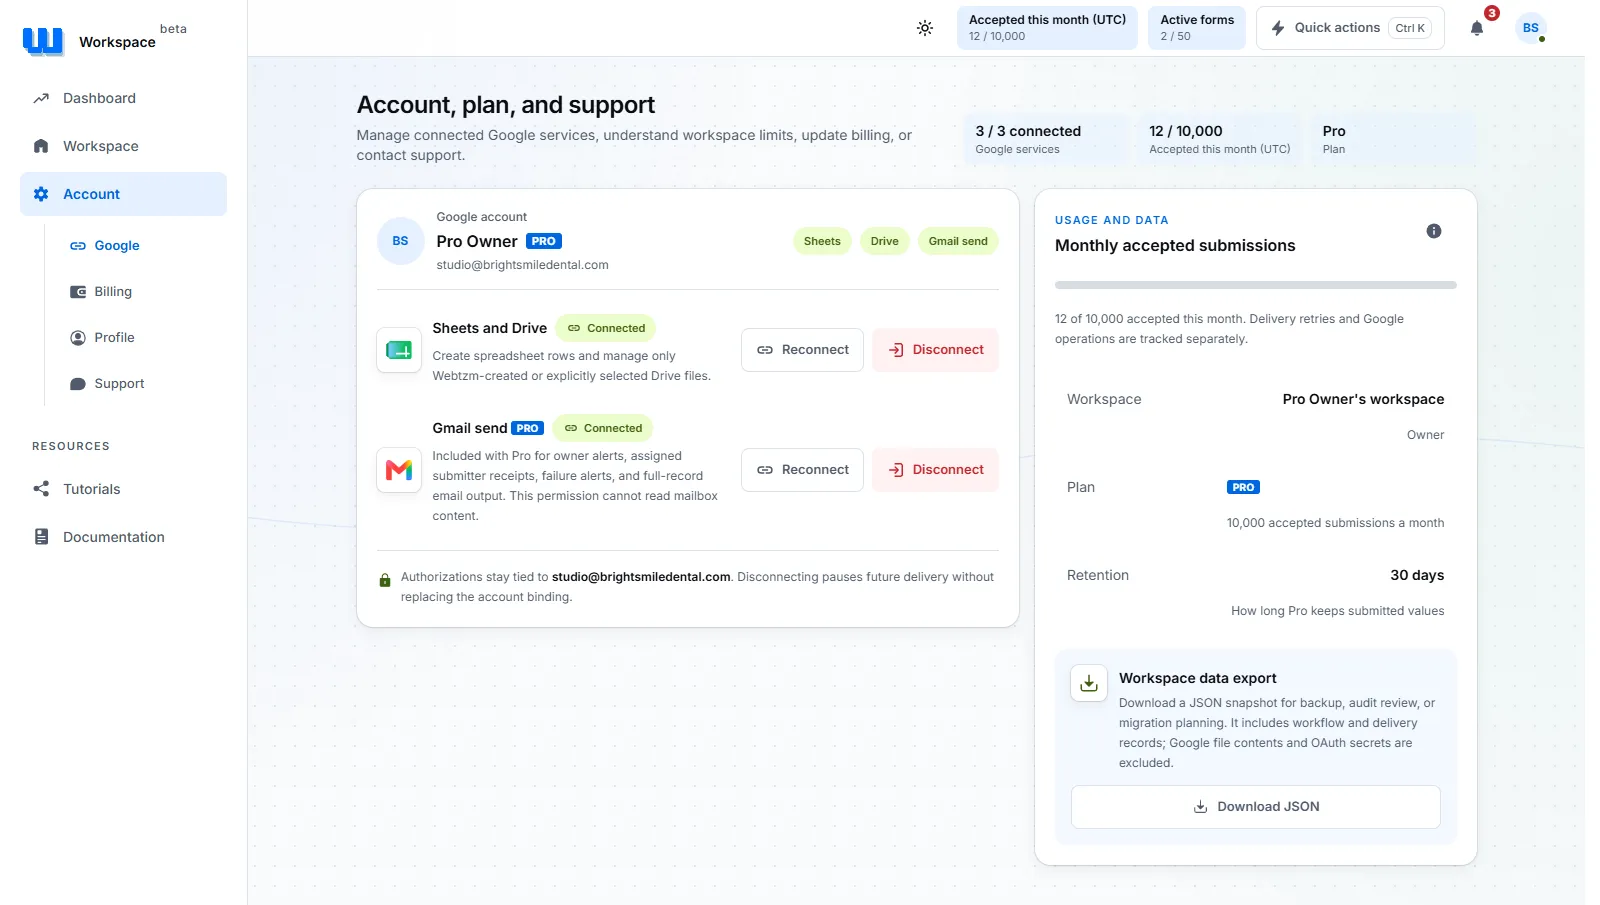
Signing in with Google tells Webtzm who you are. It does not give Webtzm access to your Sheets or your Drive. Those are a second, separate decision, and you make it here.
Open Account › Google and connect Sheets and Drive. Leave Gmail sending alone for now — this tutorial sends no email.
 Open full size
Each Google service is listed with its own state, so you can connect only what the workflow you are building actually needs. Skipped this and gone straight to Quick setup instead? That works too — a workspace with nothing connected yet shows an inline Connect Google Sheets and Drive button right above the create button, so you can grant access without leaving the page.
-
Workspace › Quick setup
Open Quick setup
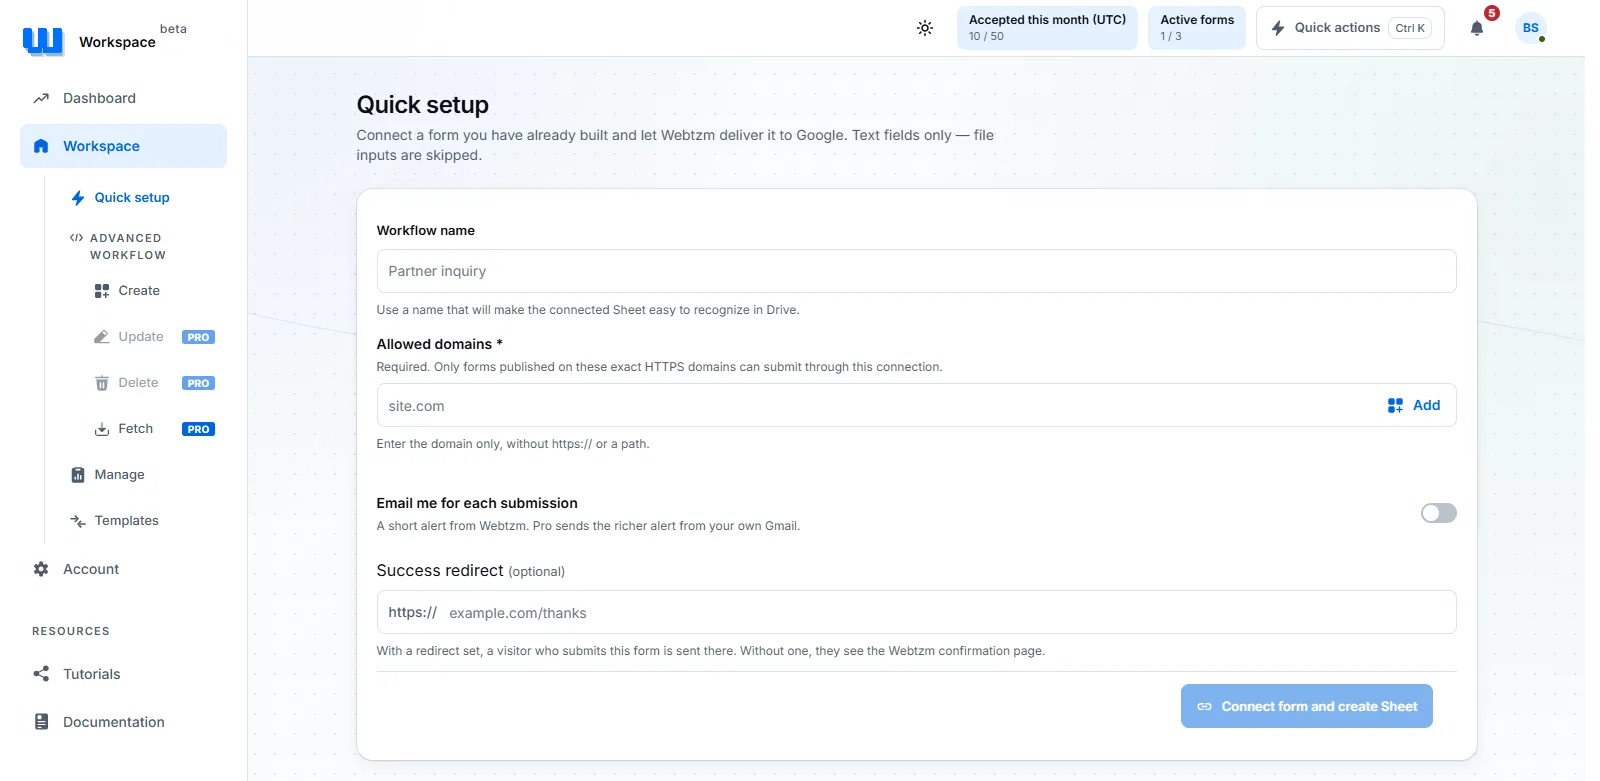
Quick setup exists for exactly this case: a form that already exists and works, which needs somewhere to put its answers. It asks for a name, a domain, and two optional settings.
 Open full size
Quick setup on a fresh workspace. The create button stays unavailable until the required setup is valid — an empty allowed-domain list is the usual reason. -
Workspace › Quick setup
Name it, and name the domain it lives on
- In Workflow name, type something you will recognise in Drive six months from now.
Clinic contact formbeatsForm 1. - In Allowed domains, type the hostname only —
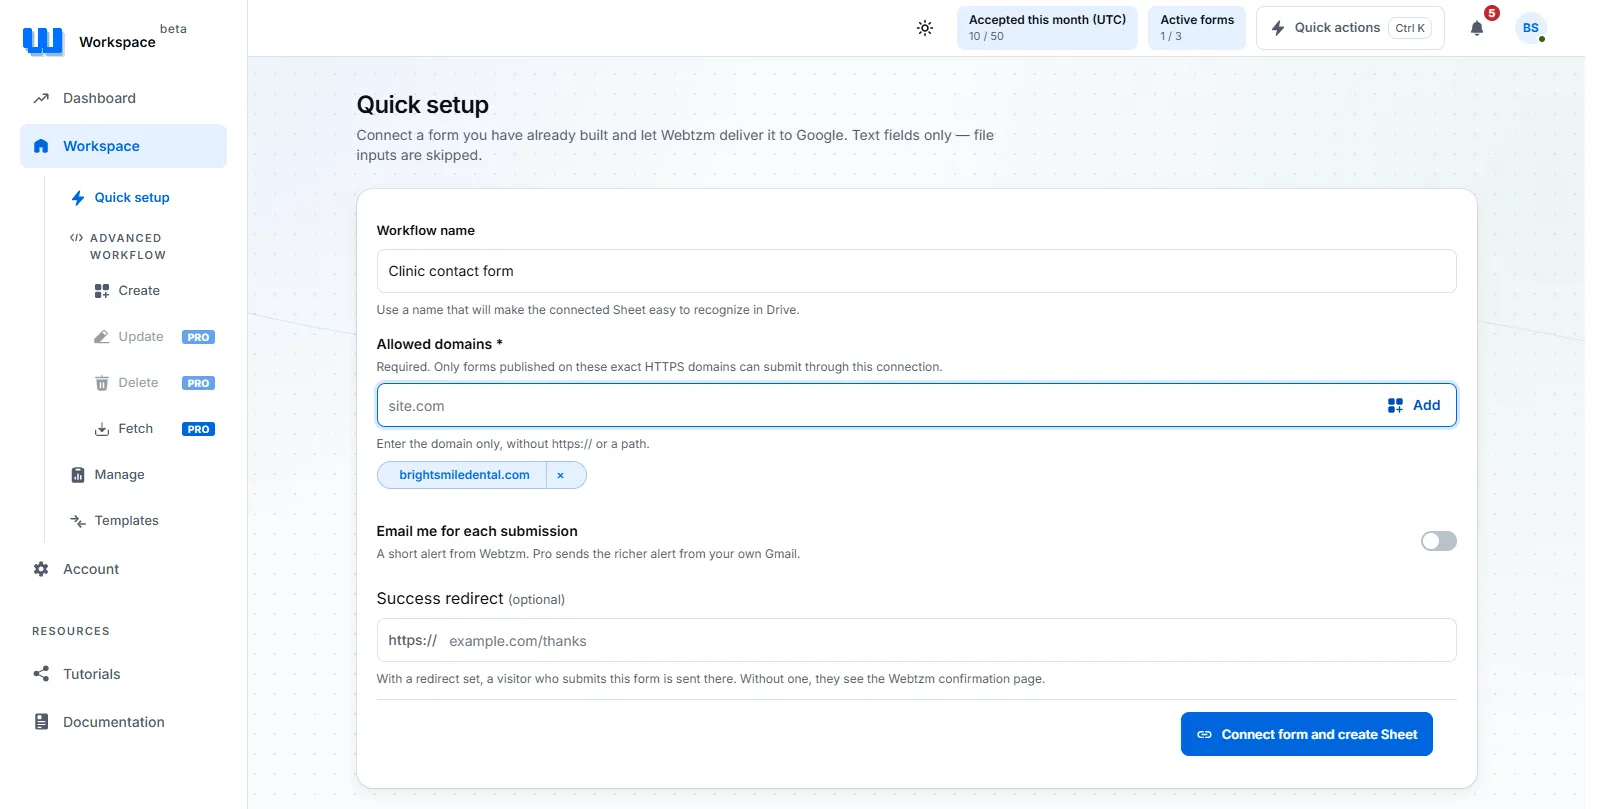
brightsmiledental.com— and press Add. Nohttps://, no path, no port, no wildcard. - Leave Email me for each submission off for now. It sends a short Webtzm alert to reception on every enquiry — free on every plan — but it is not required to finish setup.
- Leave Success redirect empty too. Without one, a visitor who submits sees Webtzm's own confirmation page, which is enough while you are only testing.
 Open full size
The domain becomes a chip once added. Webtzm protects exactly https://brightsmiledental.com— every other origin is refused.Then select Connect form and create Sheet. Webtzm creates the spreadsheet in your Drive and returns a setup panel with the endpoint already on screen.
Before you touch your own site, select Send a test submission next to the endpoint. It opens the console-hosted test page, submits through the real path, and the row appears in Dashboard › Submissions and the managed Sheet — so you know the wiring works before anything is public. This is the same three-step quickstart in miniature: sign in, create the workflow and paste the endpoint, then send a test and see the row.
- In Workflow name, type something you will recognise in Drive six months from now.
-
Workspace › Manage › Setup
Point your form at the endpoint
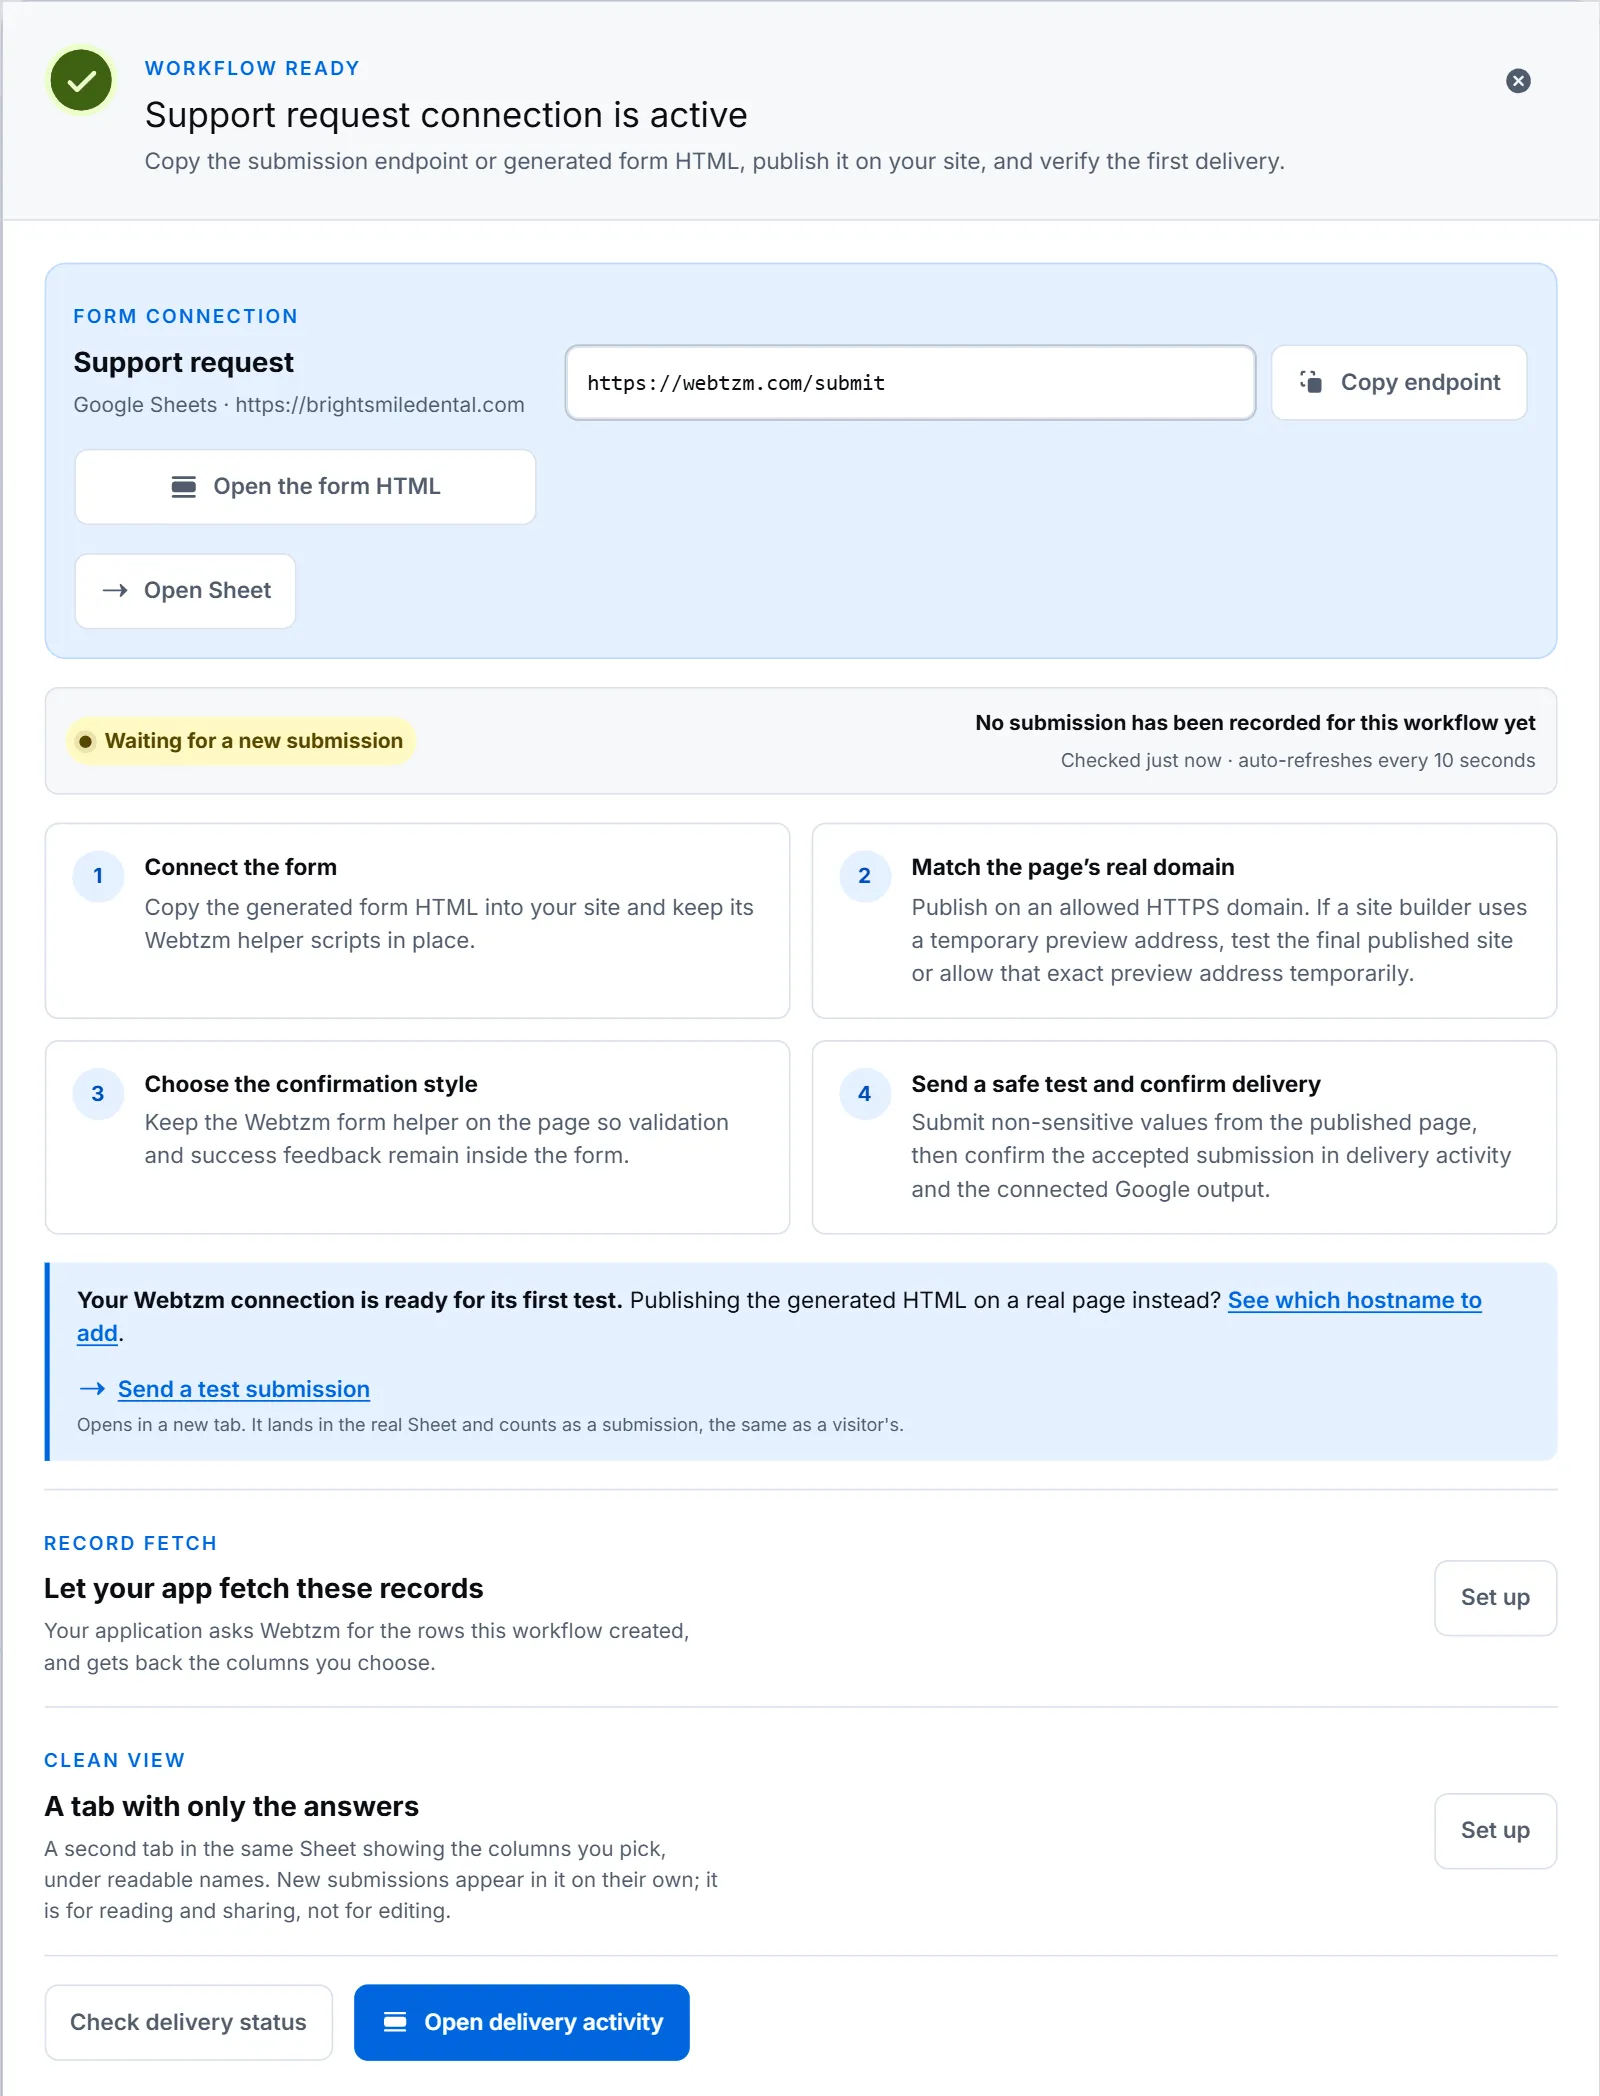
The setup panel is the one screen worth keeping open while you edit your site. It holds the endpoint, a four-step checklist, and a live indicator that flips the moment a real submission arrives.
 Open full size
You can reopen this at any time from Manage — the row's actions menu has Setup. It offers Send a test submission too, the same test page from Quick setup. Copy the endpoint, then change three things in your existing markup: the
action, themethod, and any field that has noname.Your existing contact form, after three edits — replace the endpoint with the one your panel shows <form action="https://webtzm.com/submit/YOUR_FORM_ID" method="post"> <label for="name">Your name</label> <input id="name" name="name" type="text" required> <label for="email">Email</label> <input id="email" name="email" type="email" required> <label for="message">How can we help?</label> <textarea id="message" name="message" rows="4"></textarea> <button type="submit">Send</button> </form> -
Your own site
Publish, then send one safe test
Publish the page, open it at its real address, and submit one enquiry using invented values. Do not use a real patient's details, and never put card numbers, passwords or anything confidential through a form field.
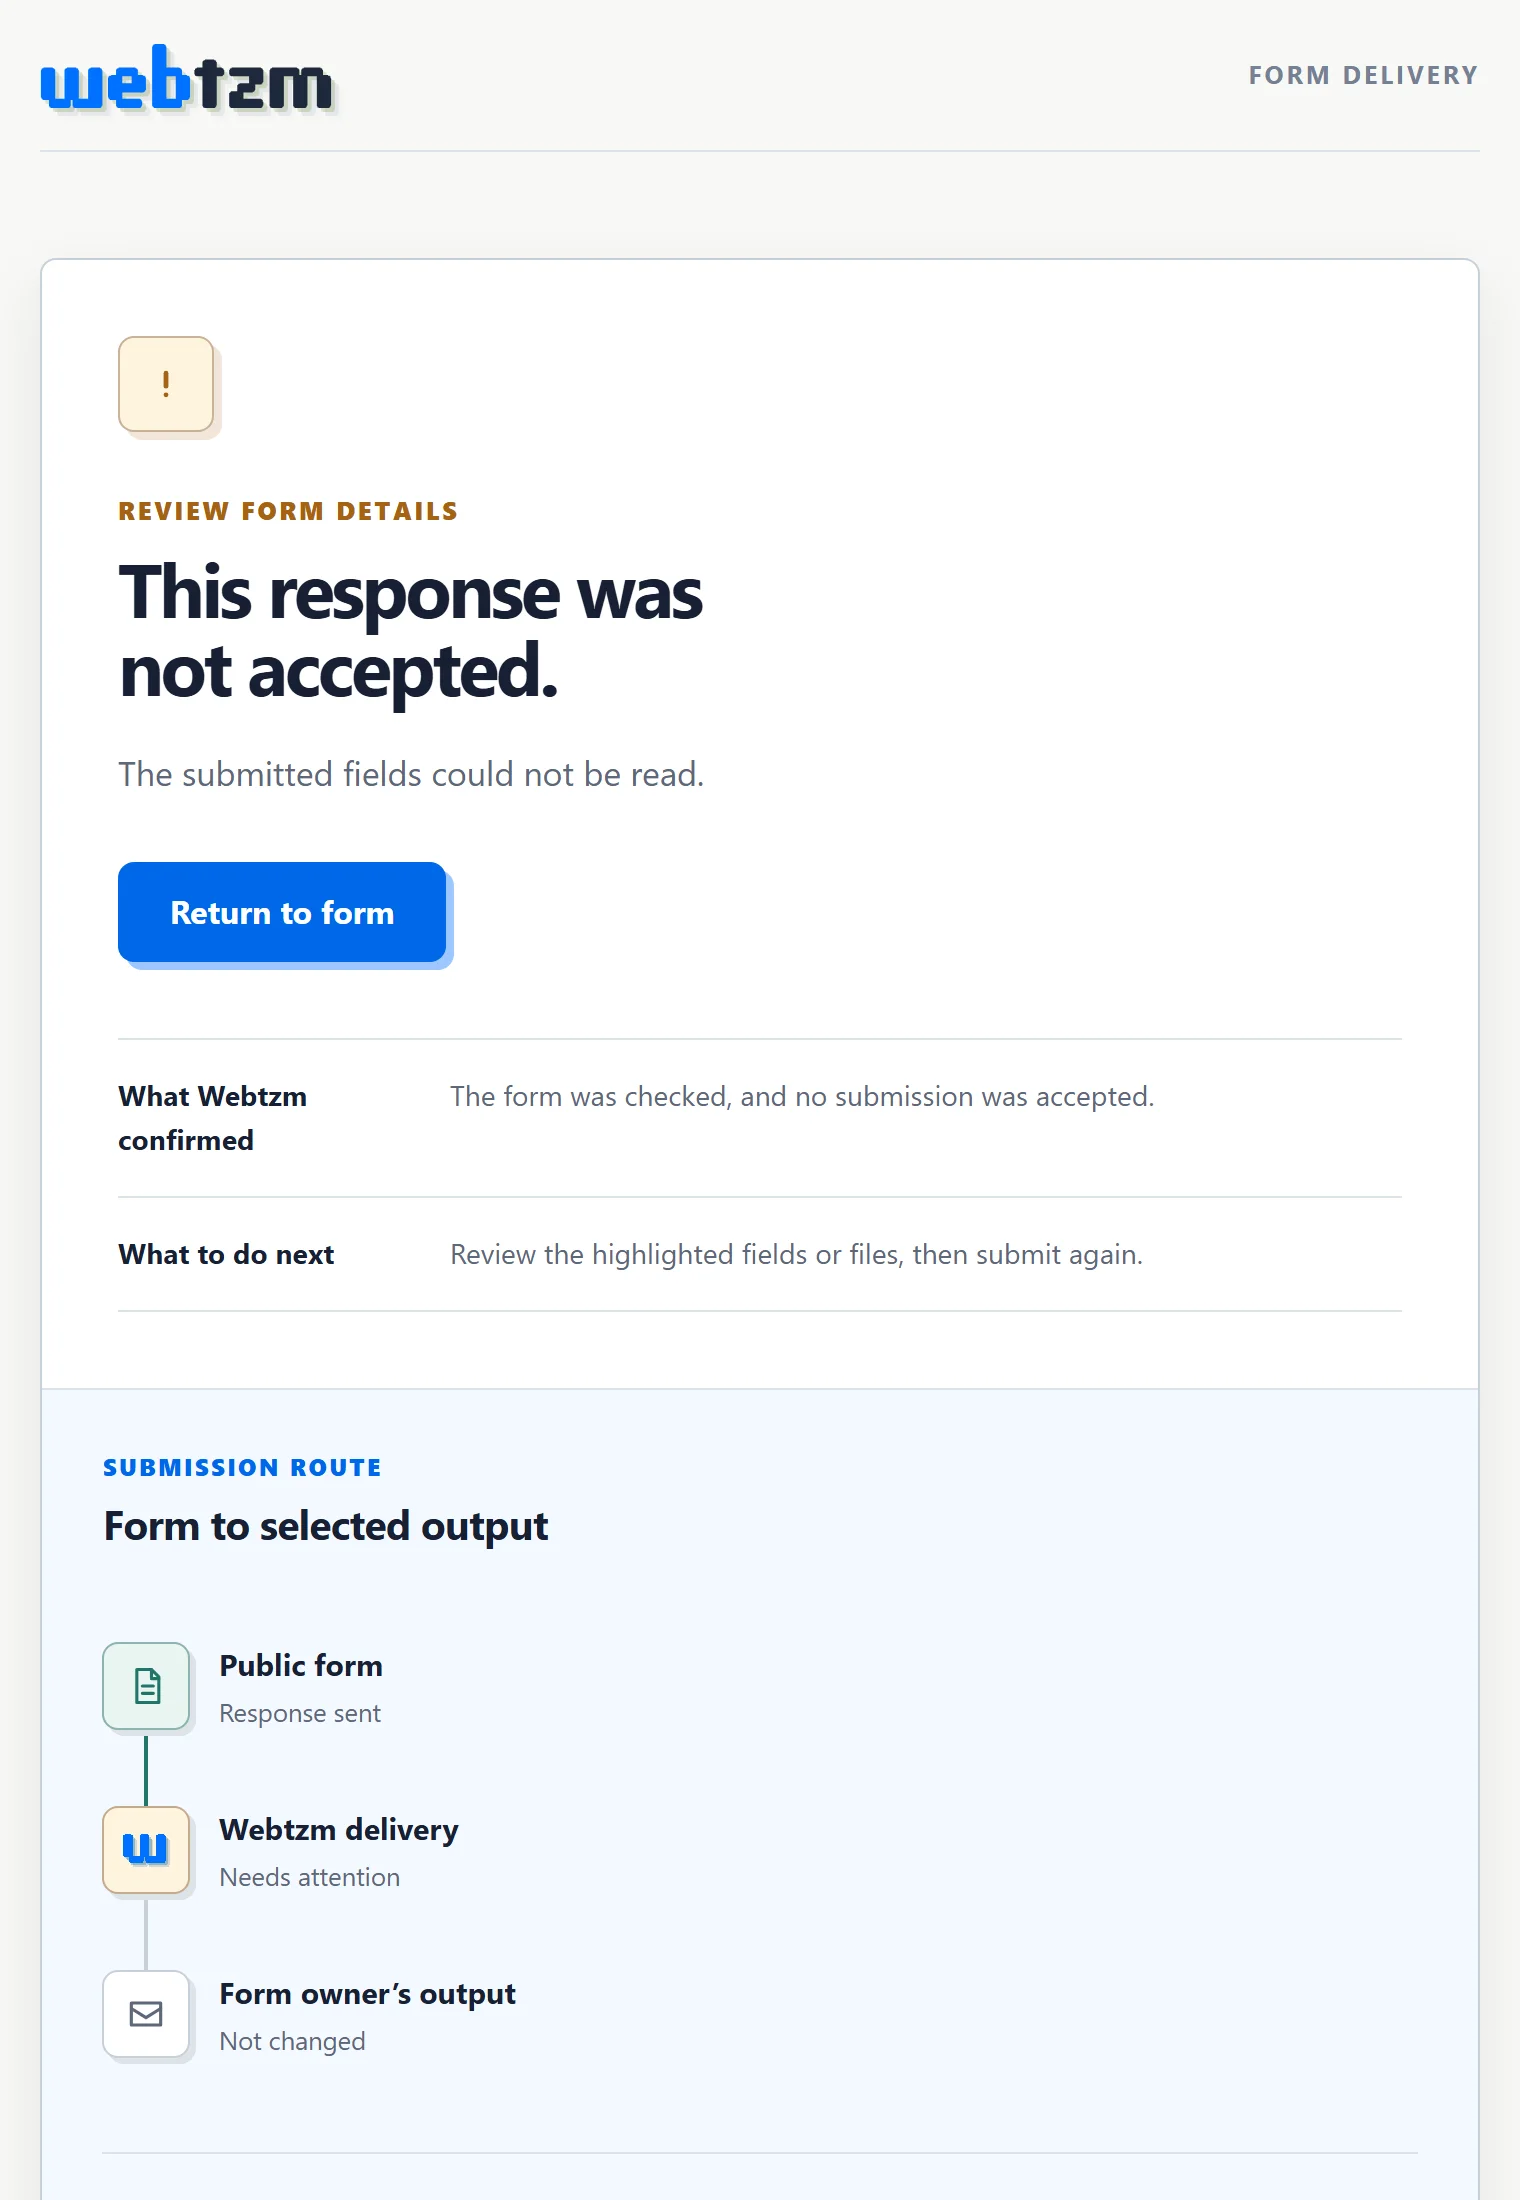
A plain form POST like this one has no Webtzm helper on the page, so the browser navigates to a Webtzm confirmation page rather than showing a message inside the form. Both outcomes are readable, and both tell the visitor what happened.
 Open full size
The outcome page after a plain POST. This capture is the rejection wording, which is the version worth recognising: it names what was checked and what to do about it, and the route diagram shows exactly how far the submission got. -
Dashboard › Submissions
Confirm it reached Google
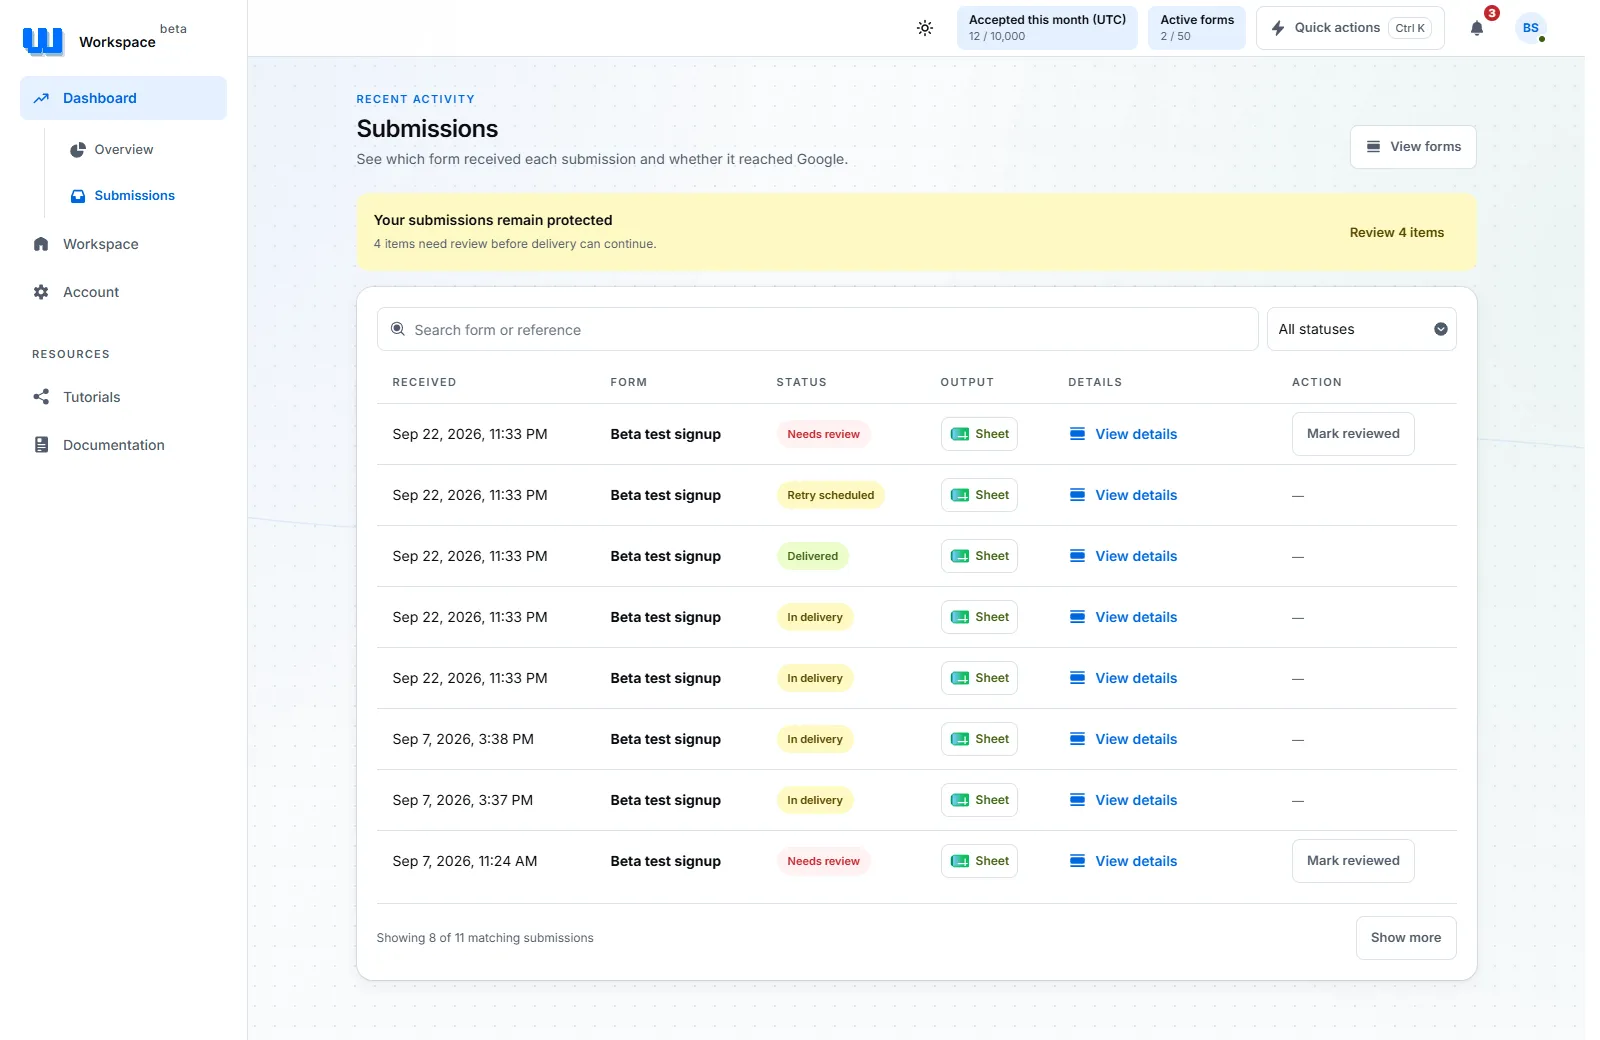
Acceptance and delivery are two different events, and Webtzm keeps them apart on purpose. The visitor is told the submission was accepted and queued. You are told, a moment later, that it reached Google.
 Open full size
Delivered is the one you are waiting for. The other states are covered in running it after launch.
What the Sheet looks like
Webtzm created one spreadsheet, named after the workflow, in the Drive of the account you connected. It has one working tab, and every accepted enquiry is one row.
| Column | Written by | What it holds |
|---|---|---|
webtzm_id | Webtzm | The protected reference for this row. An Update or Delete workflow finds the row again by this value. Always column A. |
name, email, message | Your form | One column per submitted field, named after the field's name attribute. |
accepted_at | Webtzm | When Webtzm accepted the submission. |
synced_at | Webtzm | When the row reached Google. |
You may reorder any column except webtzm_id, hide the ones you would rather not look at, and add columns of your own. Every column after the first is matched by its header name on each write, and Webtzm only ever adds columns — it never removes them.